How Can We Help?
Search for answers or browse our knowledge base.
Configure or change the wired (LAN) or wireless (WLAN) network settings for LG webOS 3.2
In this manual we will provide you with a step-by-step guide on how to configure or change your wireless (WiFi) network settings. Please have the LG remote control ready.
- Turn on the LG monitor and wait until it has fully booted.
- Press the Settings button on the remote control (gear-icon).
- Use the arrow keys on the remote control to navigate to General.
- Press the -> arrowkey to enter the General menu. Navigate to Network and press OK.
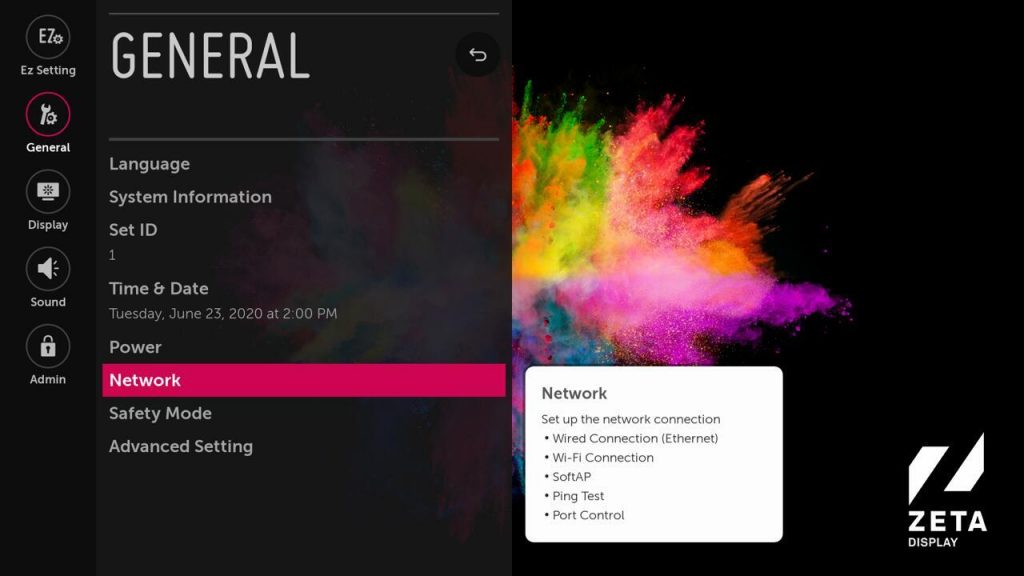
- Select your wired (LAN) or wireless (WLAN) connection and press OK to confirm.
- For wireless (WLAN) select your wireless connection in the list and press OK. Enter the password and select Connect to confirm.
- An IP address will now be issues from the network and a message will appear that an internet connection is available.
- Finally, restart your screen and wait until the ZetaDisplay application is running.
- Congratulations! You should now have a working wireless internet connection.
How to check the connection status?
When our software is running, you can press the blue button on the remote control to open the ZetaDisplay information screen.
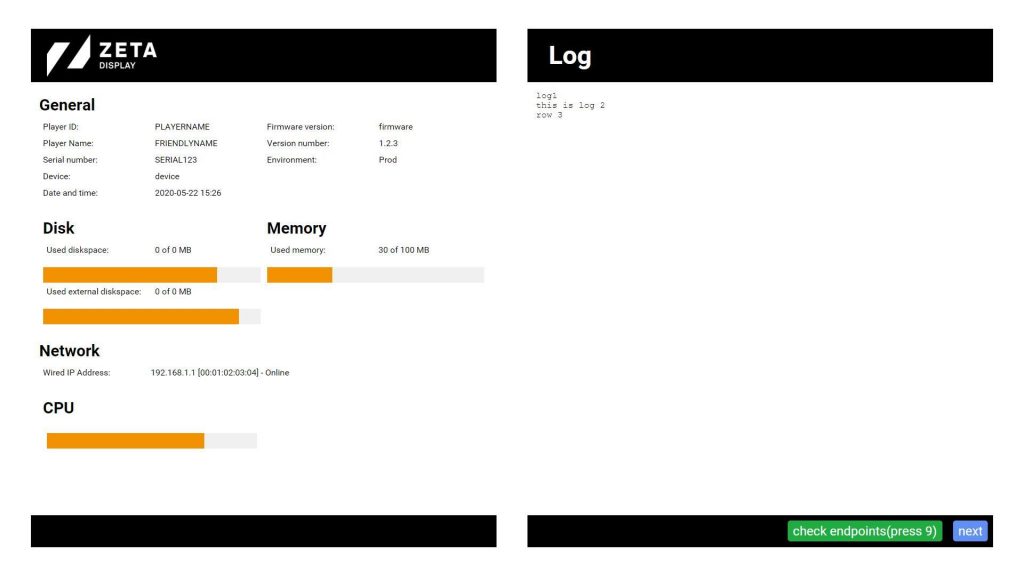
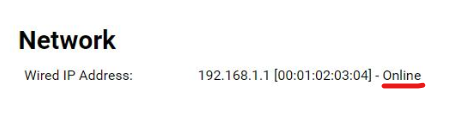
Check the status below Network. There should be:
Type of connection (Wired or Wireless)
IP address and [MAC address]
Status (online or offline)